


Overview
An ITD-10 requisition is used to request the purchase of Information Technology (IT) items or services that require approval from BITS. All ePro Requisition & ITD10 submissions are required to have a quote attached, a statement of work (SOW) when applicable, and all documentation supporting the purchase of the commodity or service.
If purchasing under a state contract, the vendor must include the contract number on the quote.
Navigation
Nav Bar > Menu > Core-CT Financials > eProcurement > Create Requisition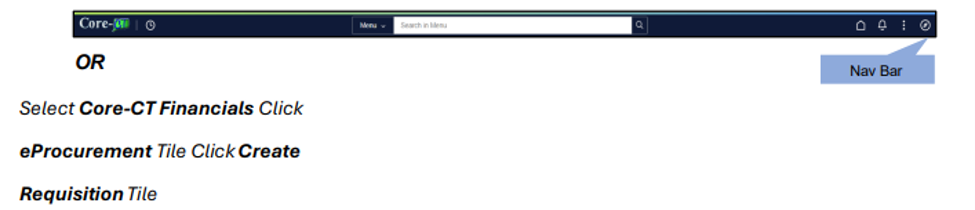
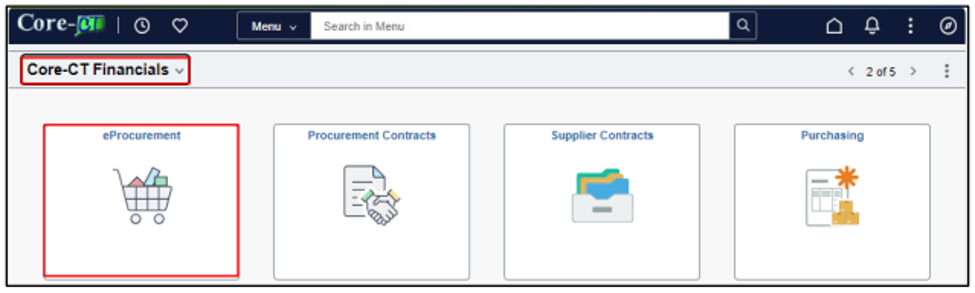
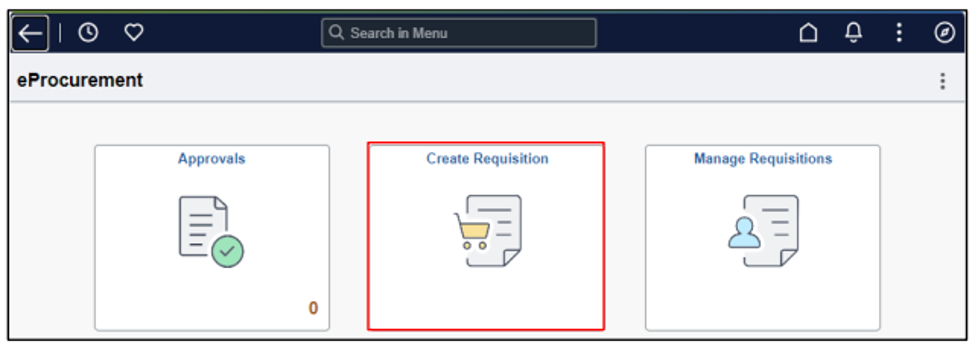
Header Defaults
1. Verify “Business Unit”
2. Enter “Requestion Name”
3. Enter “Requester”
4. Select from the drop down the “Requestion Type” (ITD-10)
5. Click on ‘Obligation Amount” under the Req Type
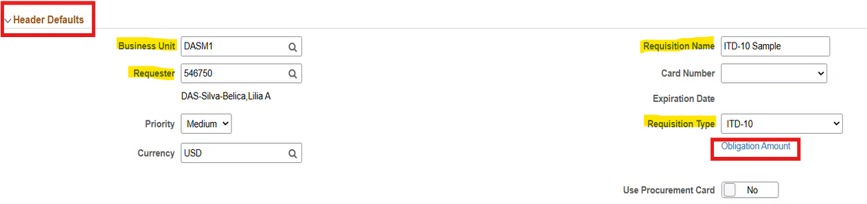
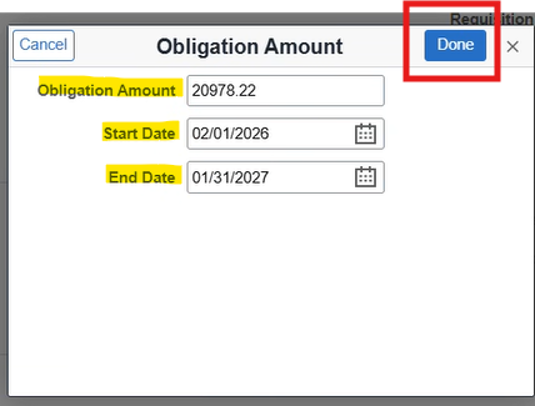
6. Enter “Obligation Amount” – this is the total amount of the purchase
7. Enter “Start Date” and “End Date”
8. Click “Enter”
Line Defaults
1. Enter “Supplier ID”
2. Confirm “Supplier Location” by using the look up, the description should be “REMIT-ACH”
3. Enter the “Buyer”, use “Look Up” if needed
4. Enter “Category”
5. Enter “Unit of Measure”

Shipping Defaults
2. Enter “Attention” this should be the person responsible for signing the invoice for payment.
3. Click “Done” in the upper right corner

Add Special Request Items
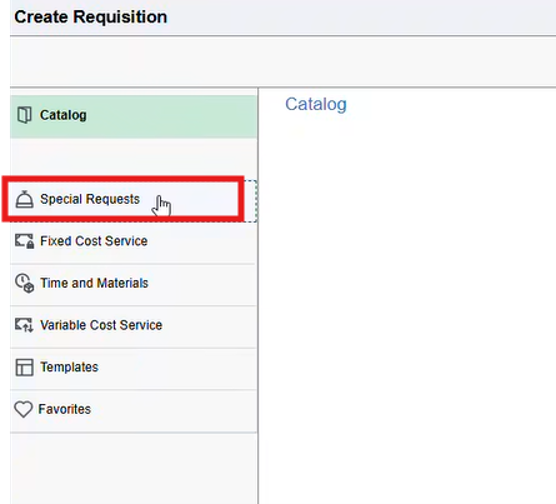
1. Select “Special Requests” on the right side to add item(s)
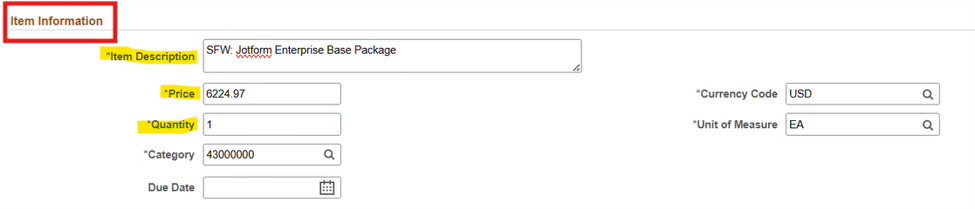
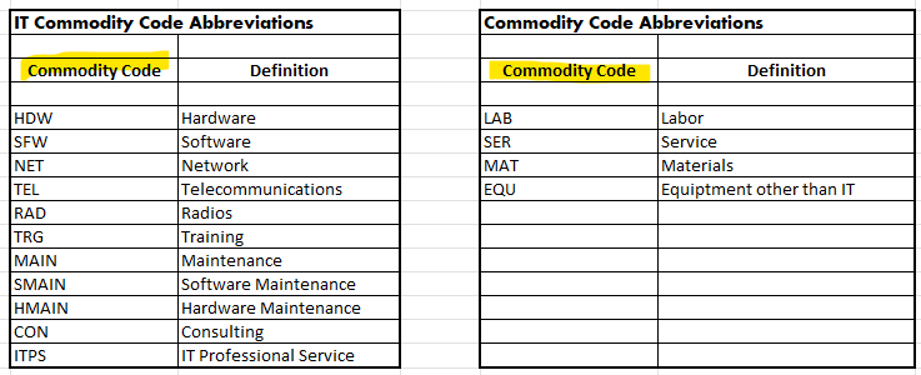
a. Enter “Item Description” (The description should start with the “Commodity Code Abbreviation”, this is an OSC requirement.)
b. Enter “Price”
c. Enter “Quantity”
Cart and Checkout
1. Select the “Add to Cart” button at the bottom left side
2. Following all items being entered, click the “cart” in the upper right corner

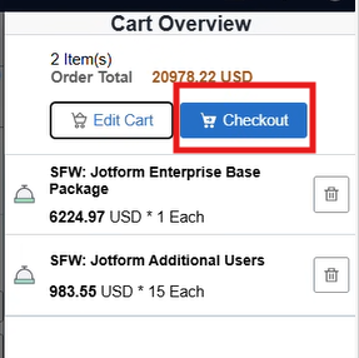
Line Comments and Attachments
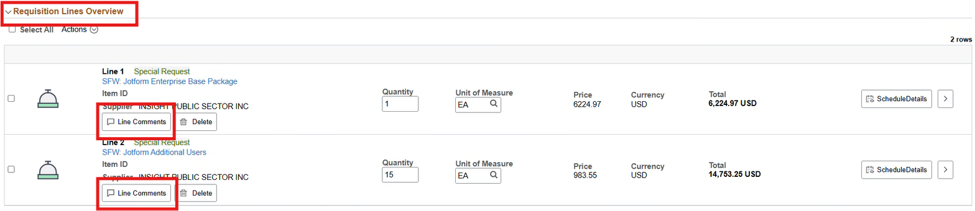
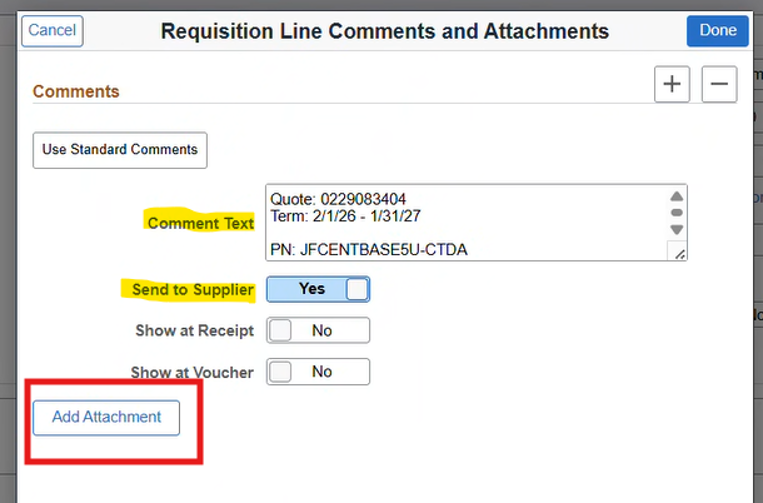
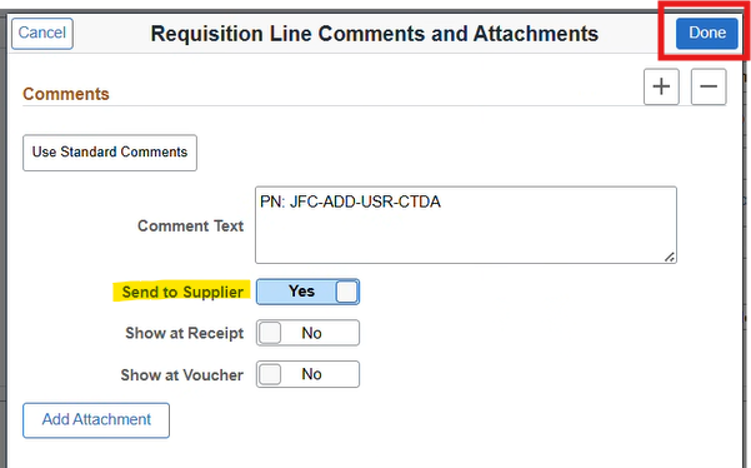
3. Select ”Send to Supplier”
4. Click “Add Attachment”
5. Upload quote here:
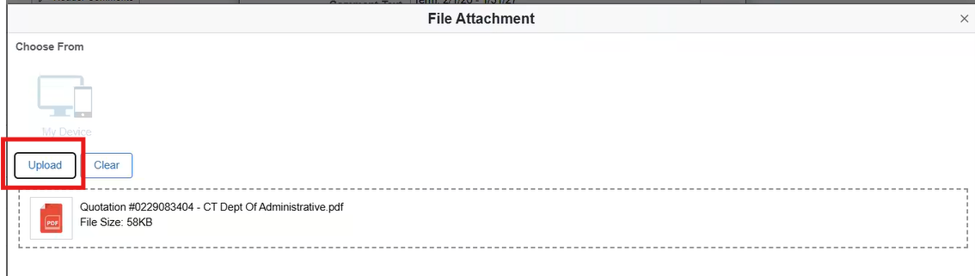
7. Click “Done” in the upper right corner
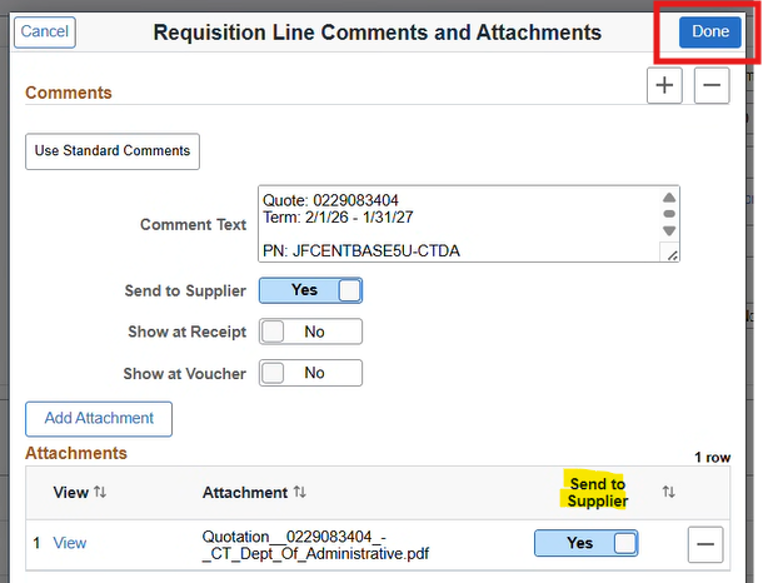
9. Select “Send to Supplier”
Schedule, Distribution, and Asset Information
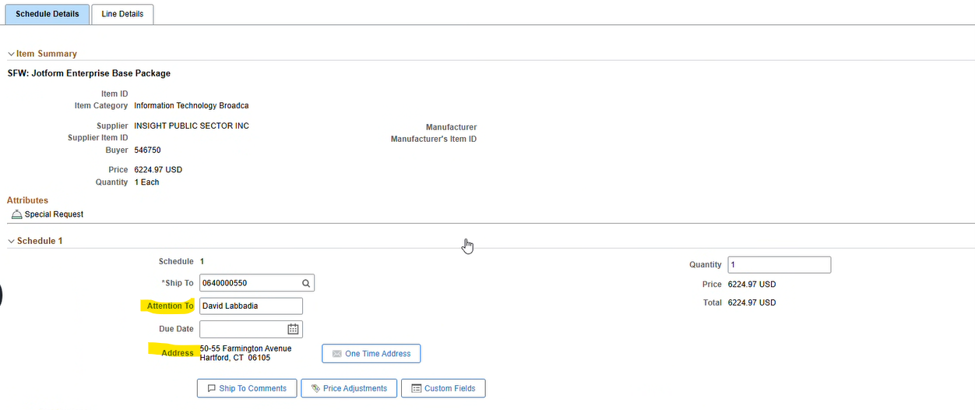
1. Click “Scheduled Details”
2. Confirm “Address” and “Attention To”
3. Distributions
4. Select the “Show All” tab (The following are required fields and can be provided by the DAS/SmART Budget Team as mentioned in Step 2: Identify and Verify Funding Source)
a. Account
b. Fund
c. Department
d. SID
e. Program
f. PC Business Unit
g. Project
If this is a controllable item, follow the next steps: if not proceed to “Item Summary” below.


1. Select the “Asset Information” tab
a. Enter “AM Business Unit”
b. Enter “Profile ID” If you are unsure of this information, reach out to your Buyer.

Line Details and Purchasing Authority
1. Click “Line Details”
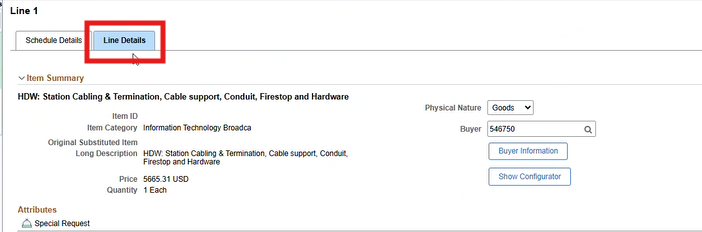
2. Click “Item Summary”
3. Select “Physical Nature” from the drop-down (goods or services)

4. Select “Amount Only” if not an asset item or a quantity of one.
5. Enter “Contract ID” use look up if needed, all valid contacts will populate


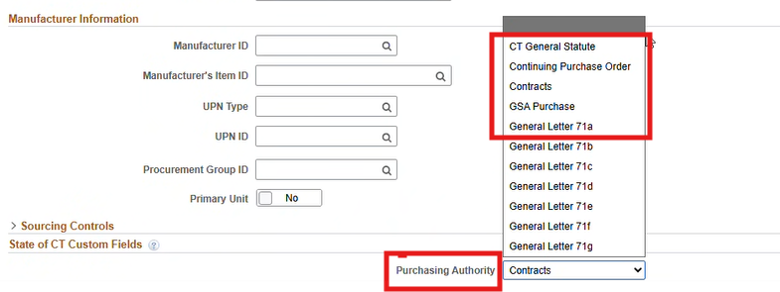
7. Scroll down to “Purchasing Authority “ and select the applicable PA from the first 5 options
SBE/MBE Good Faith Efforts and Submission
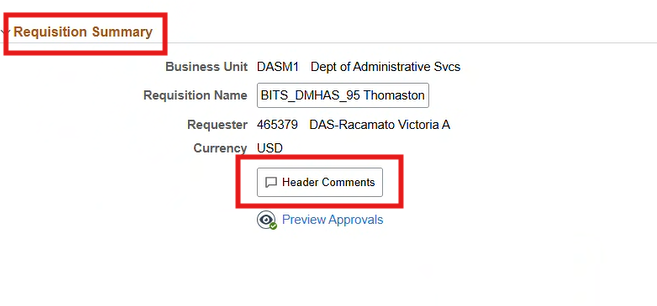
1. To select “SBE/MBE Good Faith Efforts” go to “Requisition Summary “, select “Header Comments”
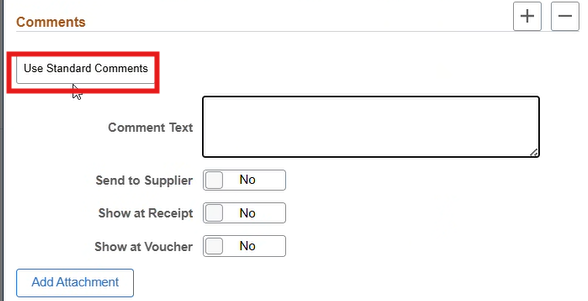
2. Select “Use Standard Comments”
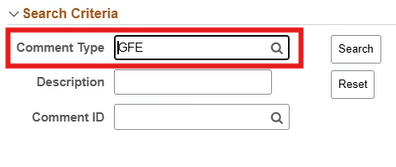
3. In “Comment Type” box type “GFE” and select “Search”
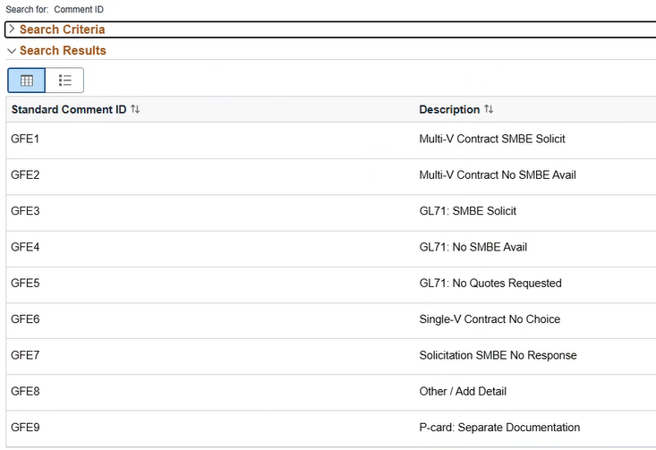
4. In the “Comment ID” box, click the magnifying glass, you will be provided 9 options, to select from
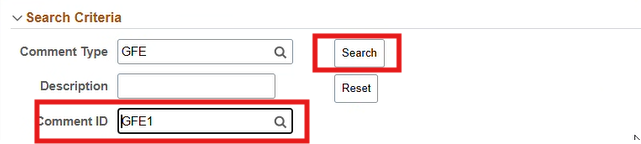
5. Enter selected Standard Comment ID & click “Search”
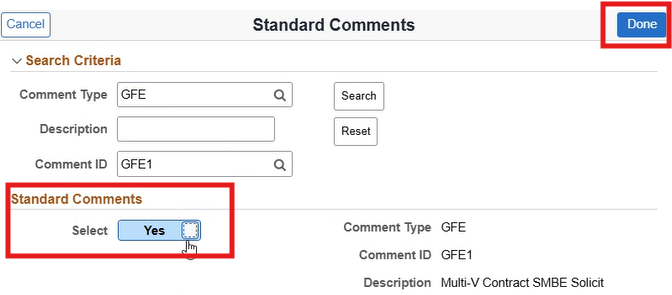
7. Select “Submit” and click “OK”
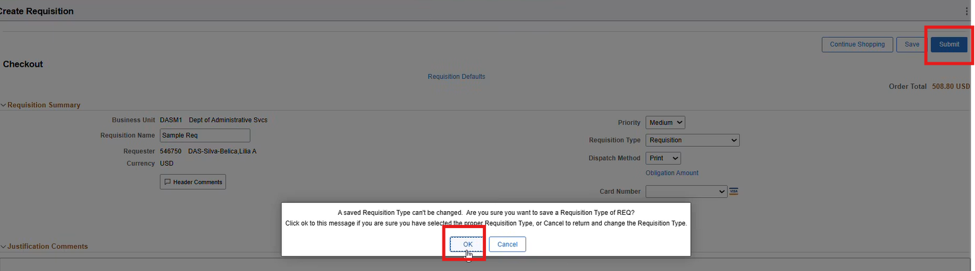
This will begin the approval process.


