Overview
There are several enhancements in Create Requisition. Requisition Defaults (formerly Define Requisition) gives users more options at the start of creating a requisition. Modifying defaults on the Requisition Defaults page saves time, especially for requisitions with multiple lines that share the same requirements. Requesters can still make modifications to individual lines from the Checkout page. Line info trumps requisition defaults information.Navigation
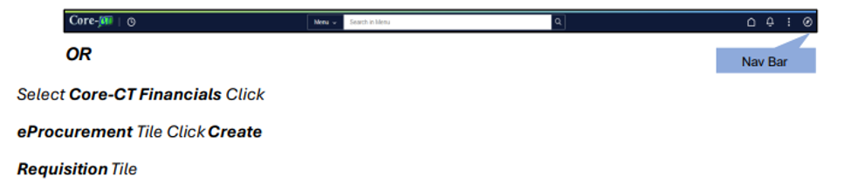
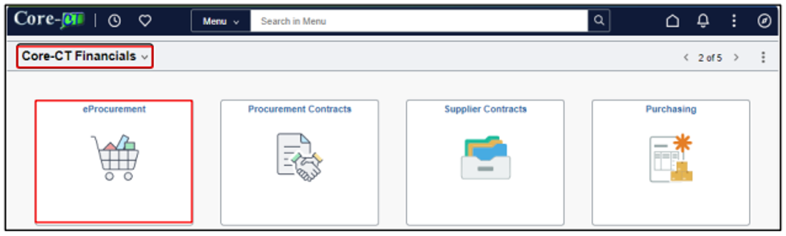
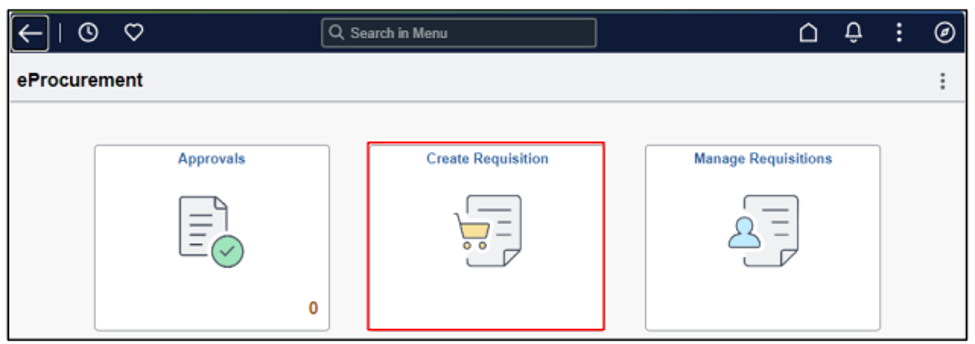
Nav Bar > Menu > Core-CT Financials > eProcurement > Create Requisition
ePro requisition is used to request the purchase of goods and/or services.
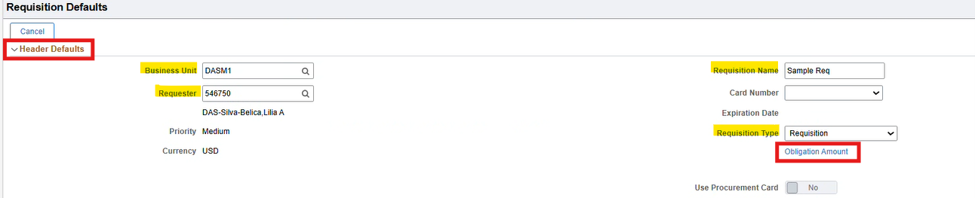
Header Defaults
- Verify “Business Unit”
- Enter “Requisition Name”
- Enter “Requester”
- Select from the drop-down the “Requisition Type” (Requisition)
- Click on ‘Obligation Amount” under the Req Type
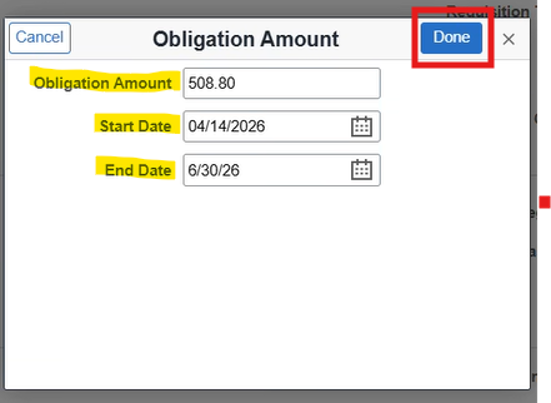
6. Enter “Obligation Amount” – this is the total amount of the purchase
7. Enter “Start Date” and “End Date”
8. Click “Done"
Line Defaults
- Enter “Supplier ID”
- Confirm “Supplier Location” by using the lookup; the description should be “REMIT-ACH”
- Enter the “Buyer”; use “Look Up” if needed
- Enter “Category”
- Enter “Unit of Measure”

Shipping Defaults
- Enter “Ship To”; use " Look Up " if needed
- Enter “Attention”; this should be the person responsible for signing the invoice for payment.

Distribution Defaults
- Select “Show all tab (The following are required fields and are what should have been / can be provided by the DAS/SmART Budget team in Step 2: Determine and Verify Funding Source)
- Account
- Fund
- Department
- SID
- Program
- PC Business Unit
- Project
- Click “Done” in the upper right corner

Add Special Request Items
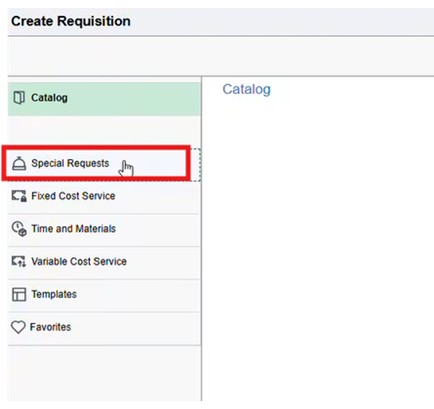
- Select “Special Requests” on the right side to add item(s)
2. Enter Item Information (the following will need to be entered for each item purchased)
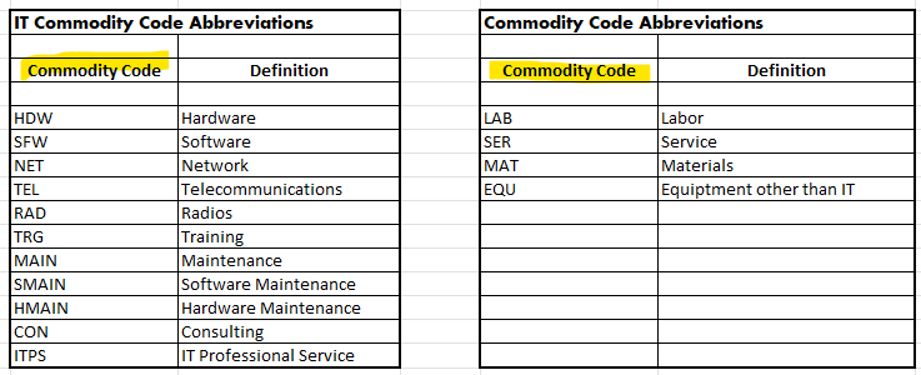
a. “Item Description”; the description should start with the “Commodity Code Abbreviation.” This is an OSC requirement.
b. “Price”
c. “Quantity”
3. Select the “Add to Cart” button at the bottom left side

Cart and Checkout
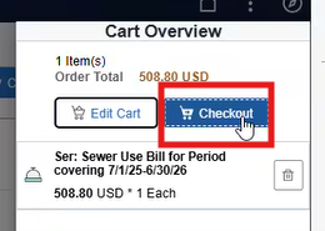
1. Once all items have been entered, click the “cart” in the upper right corner

2. The “Cart Overview” window will open; confirm all line items are entered
3. Click “Checkout”
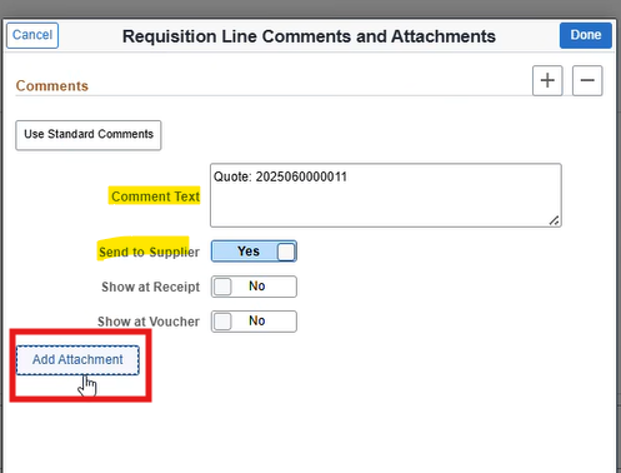
Requisition Line Comments and Attachments
1. Select “Line Comments”

2. Enter “Comment Text”
3. Select ”Send to Supplier”
4. Click “Add Attachment”
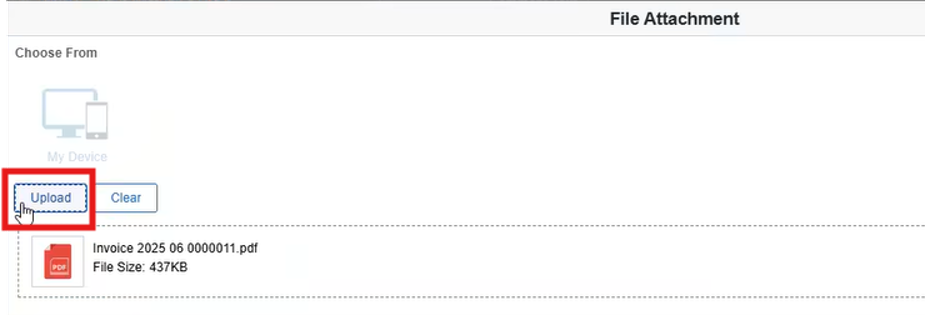
5. Upload quote
7. Click “Done” in the upper right corner
Schedule and Line Details

3. Click “Line Details”
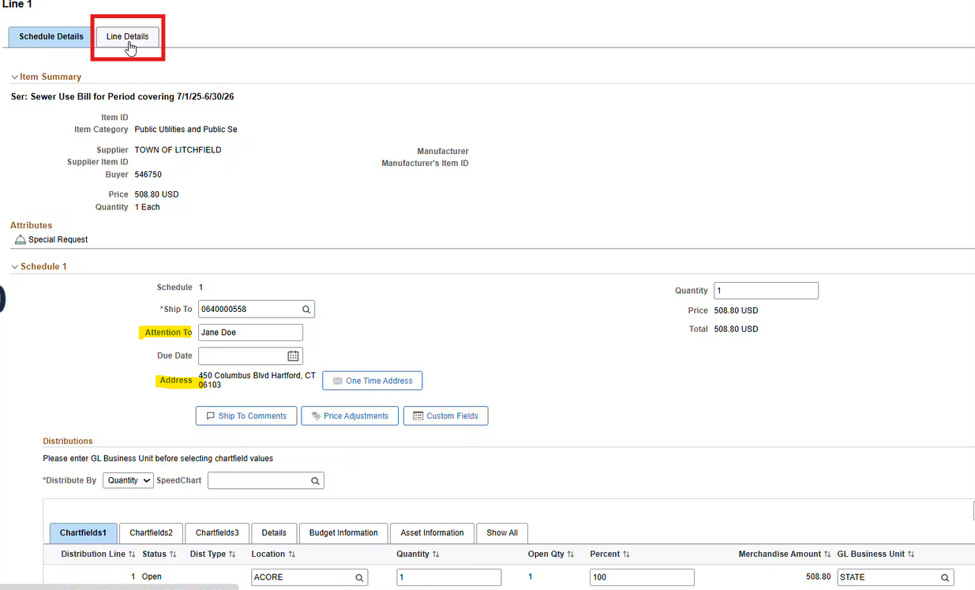
a. Select “Physical Nature” from the drop-down (goods or services)
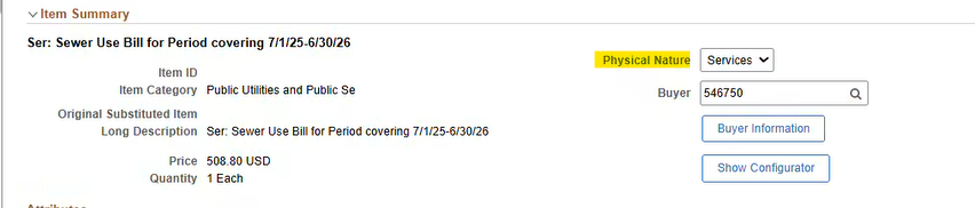
a. Select “Yes for Amount Only” only if it is a quantity of ONE.


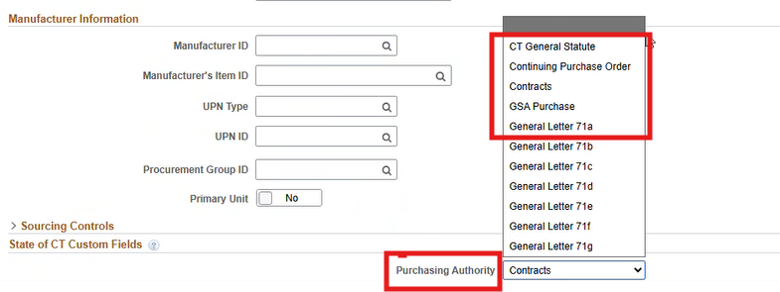
a. Enter “Purchasing Authority”; auto-default is “contract”
b. If there is no contract, you would need to select the appropriate GL71.
c. Select “Done” in the upper right corner
SBE/MBE Good Faith Efforts
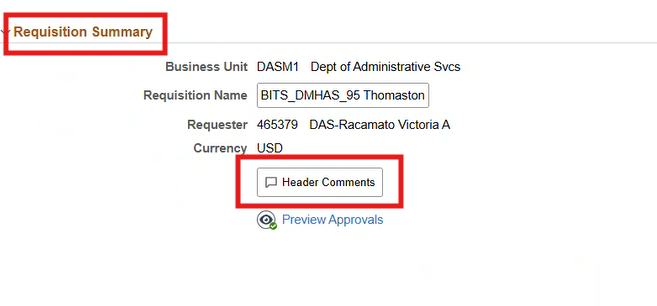
1. To select “SBE/MBE Good Faith Efforts,” go to “Requisition Summary” and select “Header Comments”
2. Select “Use Standard Comments”
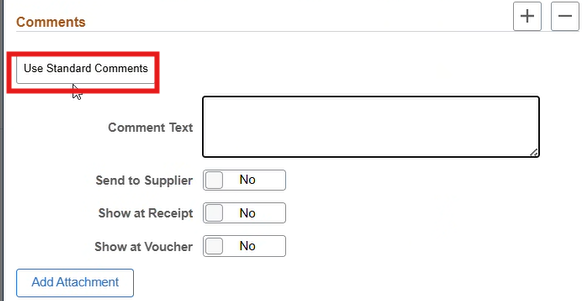
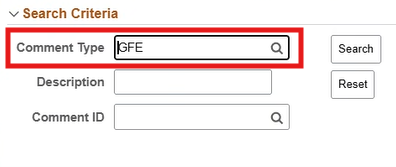
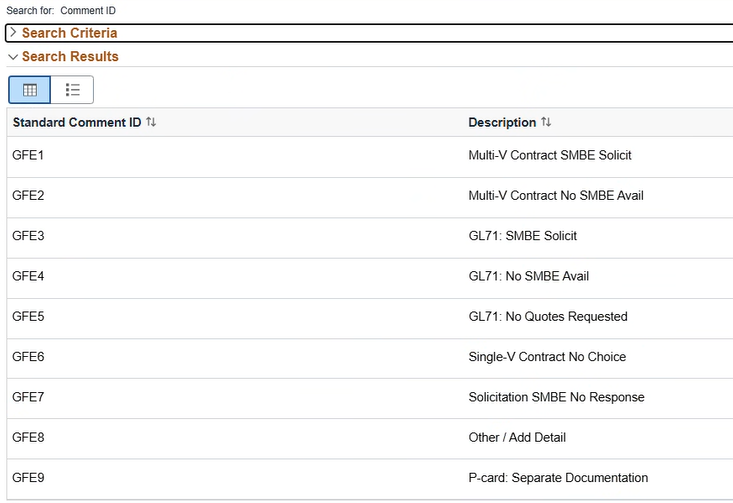
4. In the “Comment ID” box, click the magnifying glas, you will be provided with 9 options to select from.
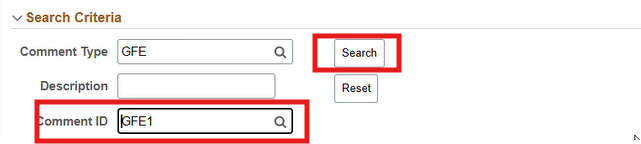
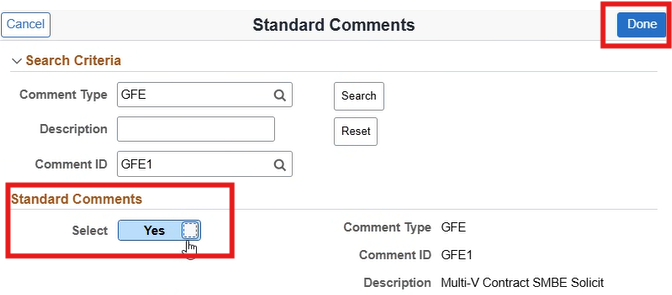
6. Under “Standard Comments, select “Yes” and click “Done” in the upper right corner.
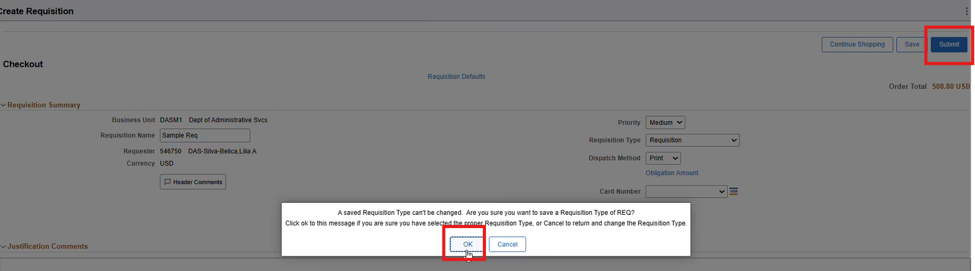
7. Select “Submit” and click “OK”