Tangoe Disconnect Process
How To
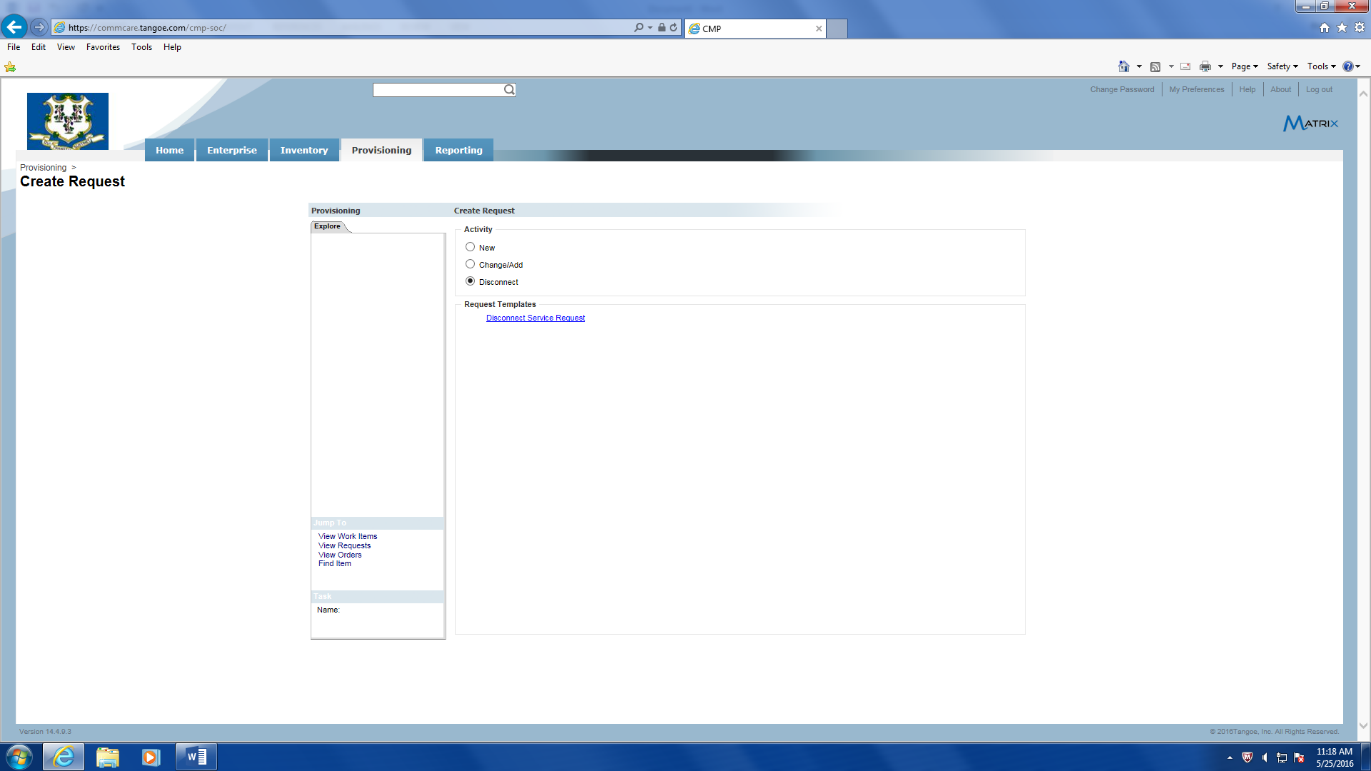
- From the main screen, select the ‘Provisioning’ tab and then the ‘Create Request’ option.
- Select the ‘Disconnect’ radio button and click the ‘Disconnect Service Request’ hyperlink to open the request template.
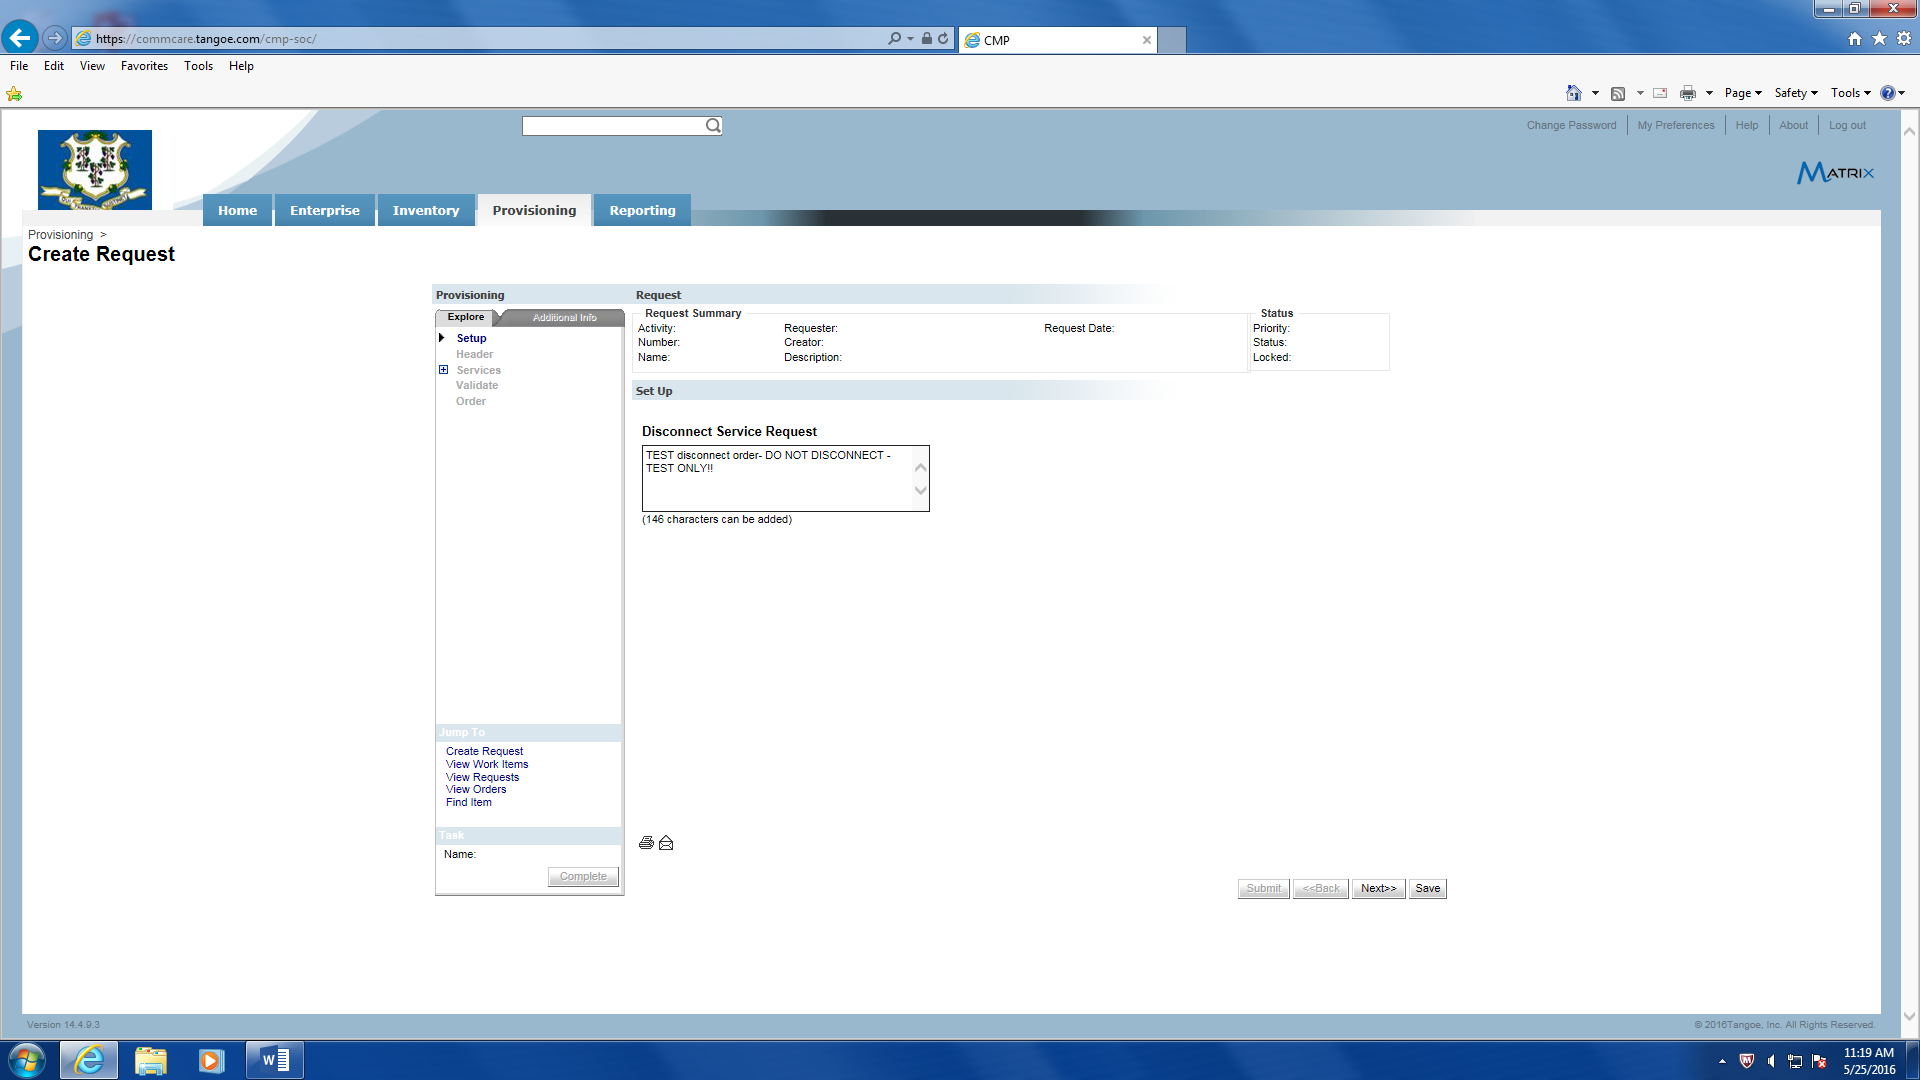
- Update the ‘Description’ field with info you feel would be useful as a reference when reviewing your requests listing. When completed click on the ‘Next’ button located at the bottom right to go to the ‘Header’ section.
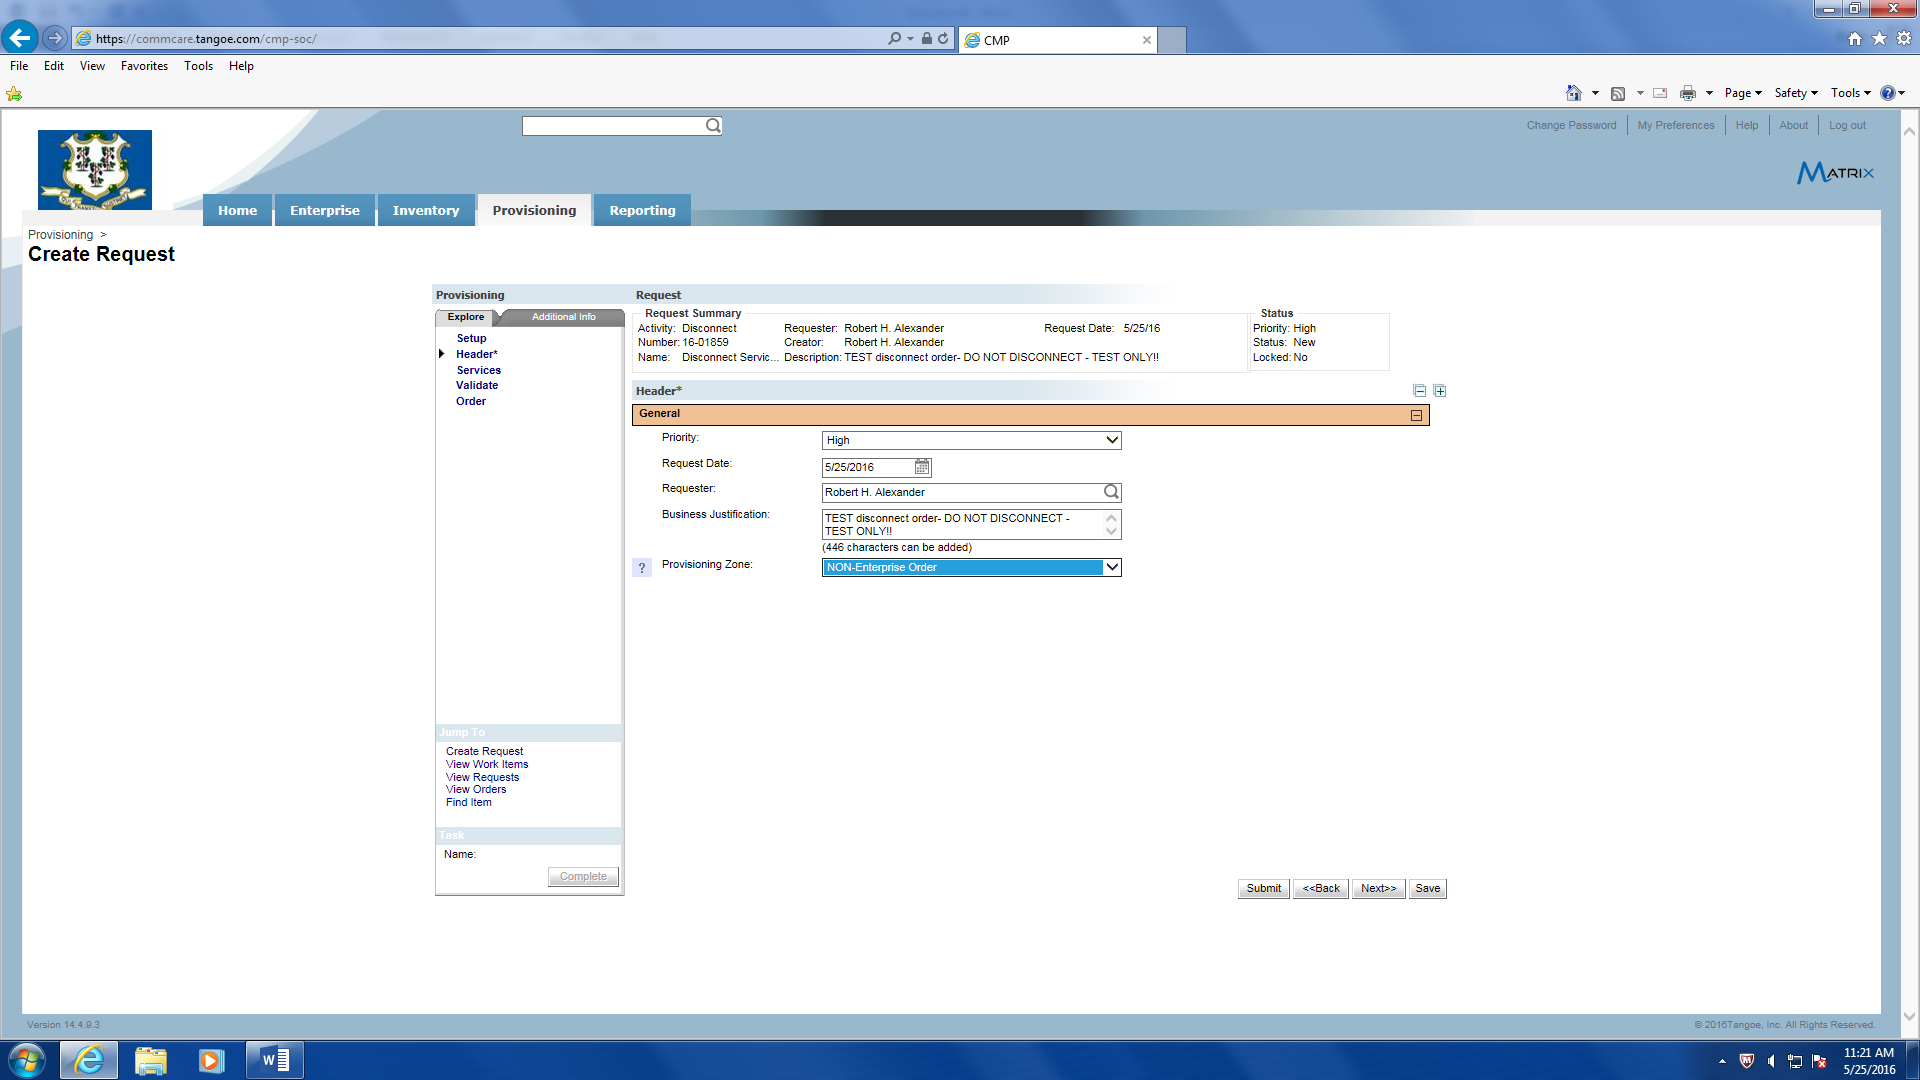
- The ‘Header’ section requires the following:
- Select an appropriate priority from the ‘Priority’ drop down menu.
- Enter the date that the requestor would like to have the service disconnected in the ‘Request Date’ field.
- Click the magnifying glass to perform a lookup of the requestors name from the employee lookup pop up window.
- Enter any business justification text in the ‘Business Justification’ field.
- In the ‘Provisioning Zone’ you must enter whether or not this request if for the Unified Communications Enterprise Telephone System (UCETS). If you do not know what UCETS is then please select ‘Non-Enterprise’.
- Click ‘Next’ to go to the ‘Services’ section.
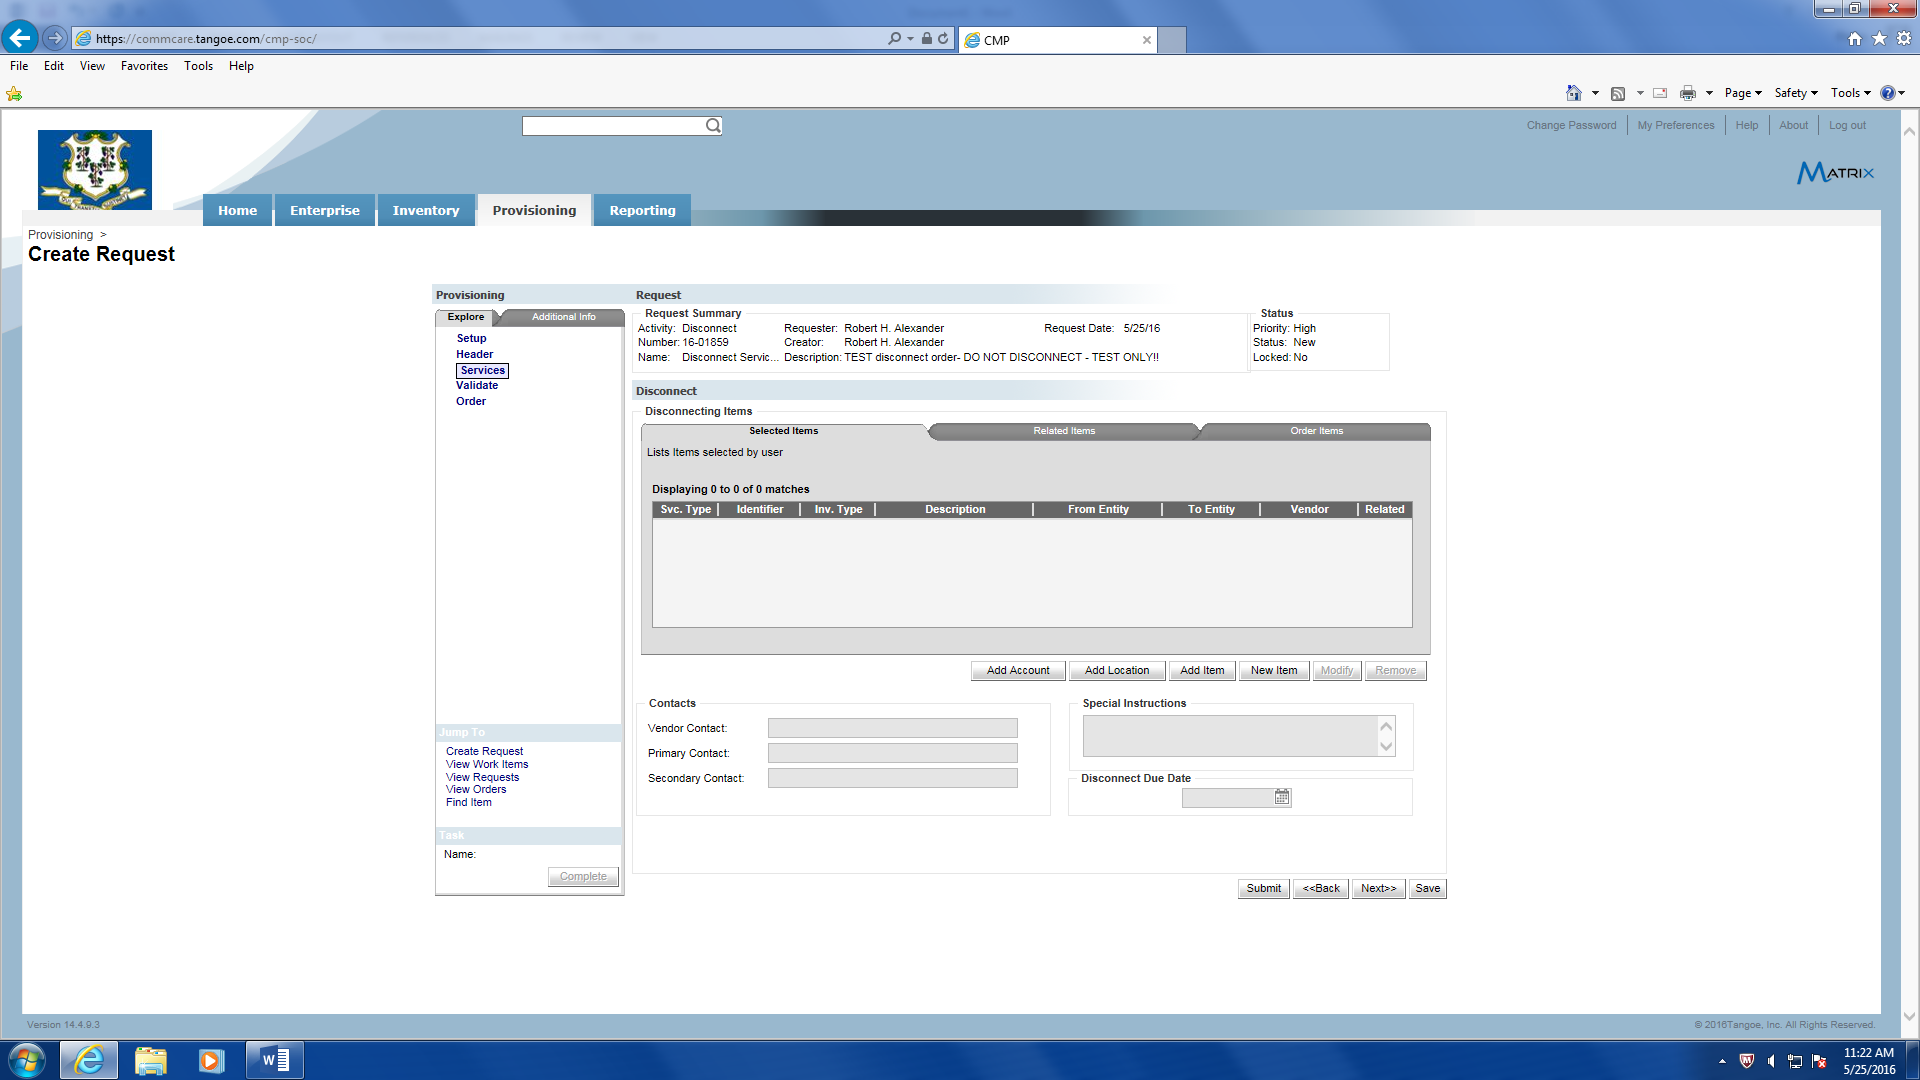
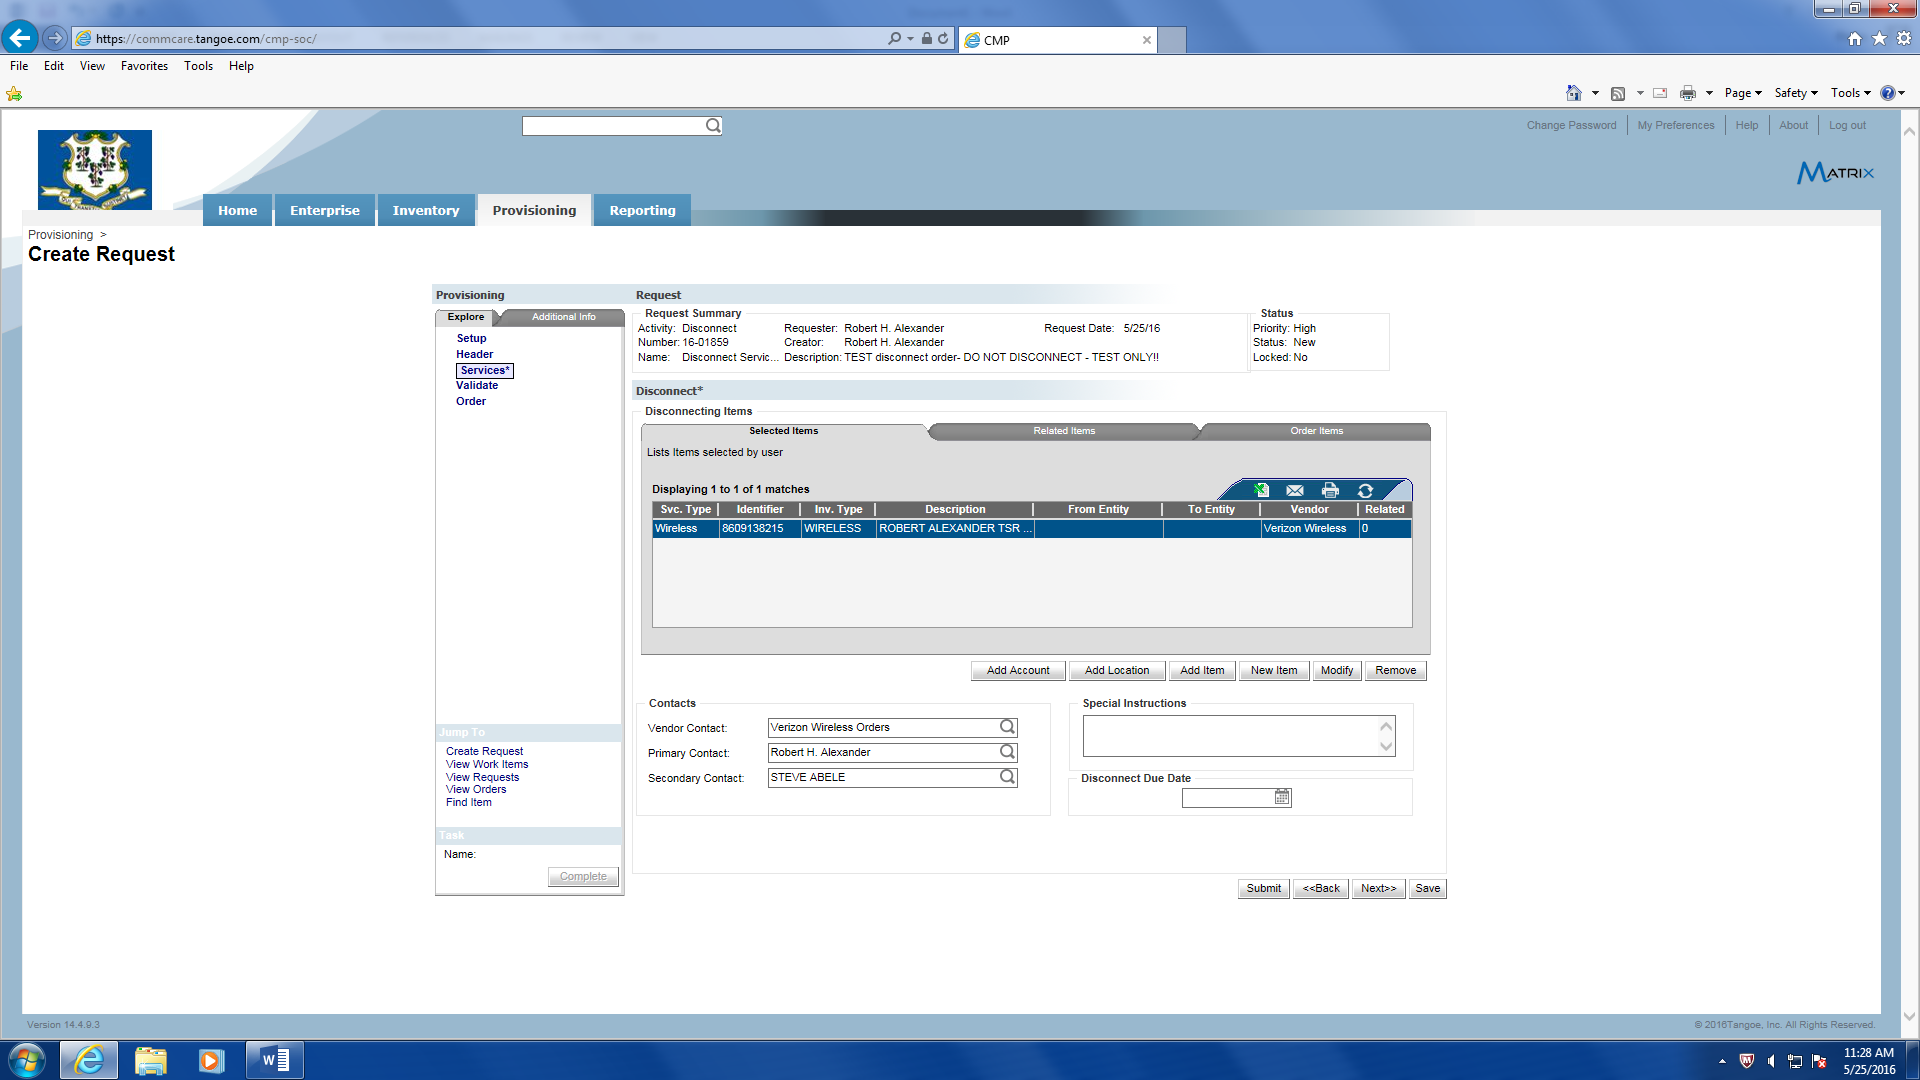
- The ‘Services’ section requires the following:
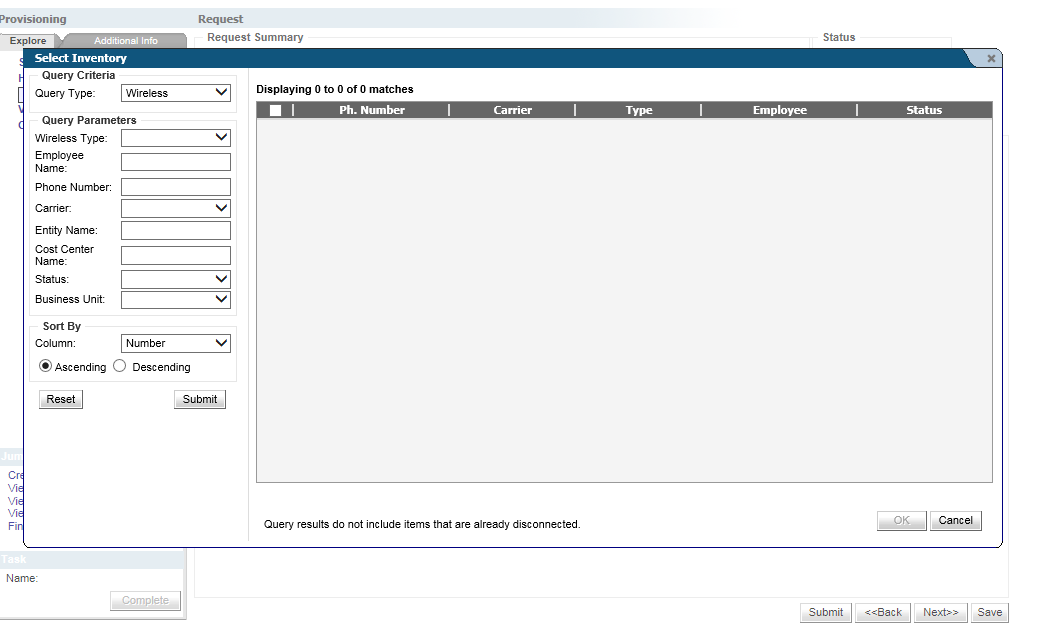
- Click on the ‘Add Item’ button (‘Add Account’ or ‘Add Location’ should not be selected) to select the inventory item to be disconnected via the ‘Select Inventory’ pop-up window.
- At the pop-up window, select a ‘Query Type’ from the drop down window that defines the device being disconnected and then the appropriate identifier for the item. The below example is for ‘Wireless’, then enter the wireless ‘phone number’ and click submit. Click on the line item result and then click ‘OK’. Repeat this step for multiple disconnect items from the same vendor.
- Click the ‘Vendor Contact’ field magnifying glass and enter the ‘Company’ from the drop down field and click the ‘Submit’ button. Select the correct vendor and click the ‘Ok’ button.
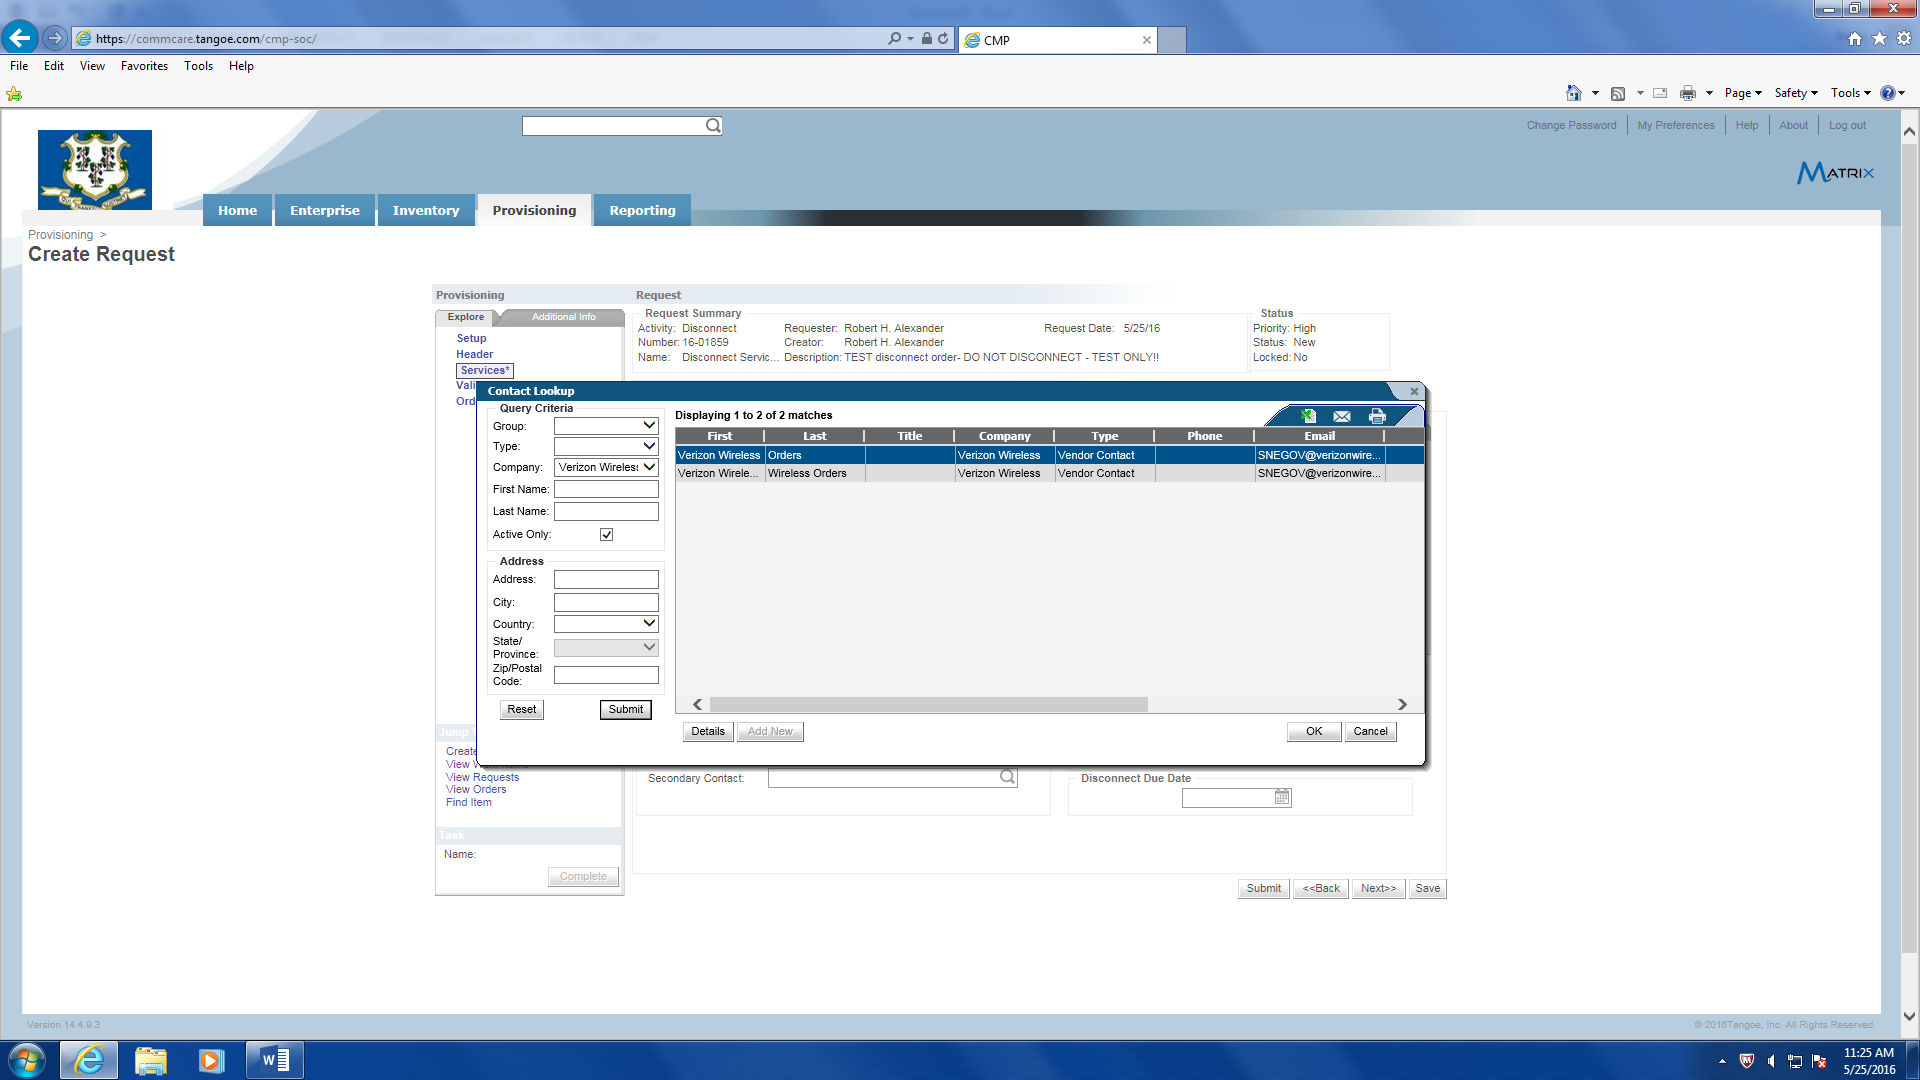
- Click the ‘Primary Contact’ field magnifying glass and enter the employee’s first and last name, and click the ‘Submit’ button. Add a ‘Secondary Contact’ if needed following the same process.

- You can optionally add any special instructions in the ‘Special Instructions’ field.
- In the ‘Disconnect Due Date’ field enter the date of the expected disconnect date. Click ‘Next’ to proceed to the ‘Validate’ section.
- Note: If multiple items are being disconnected you need to enter contact info and disconnect dates for each of the items.
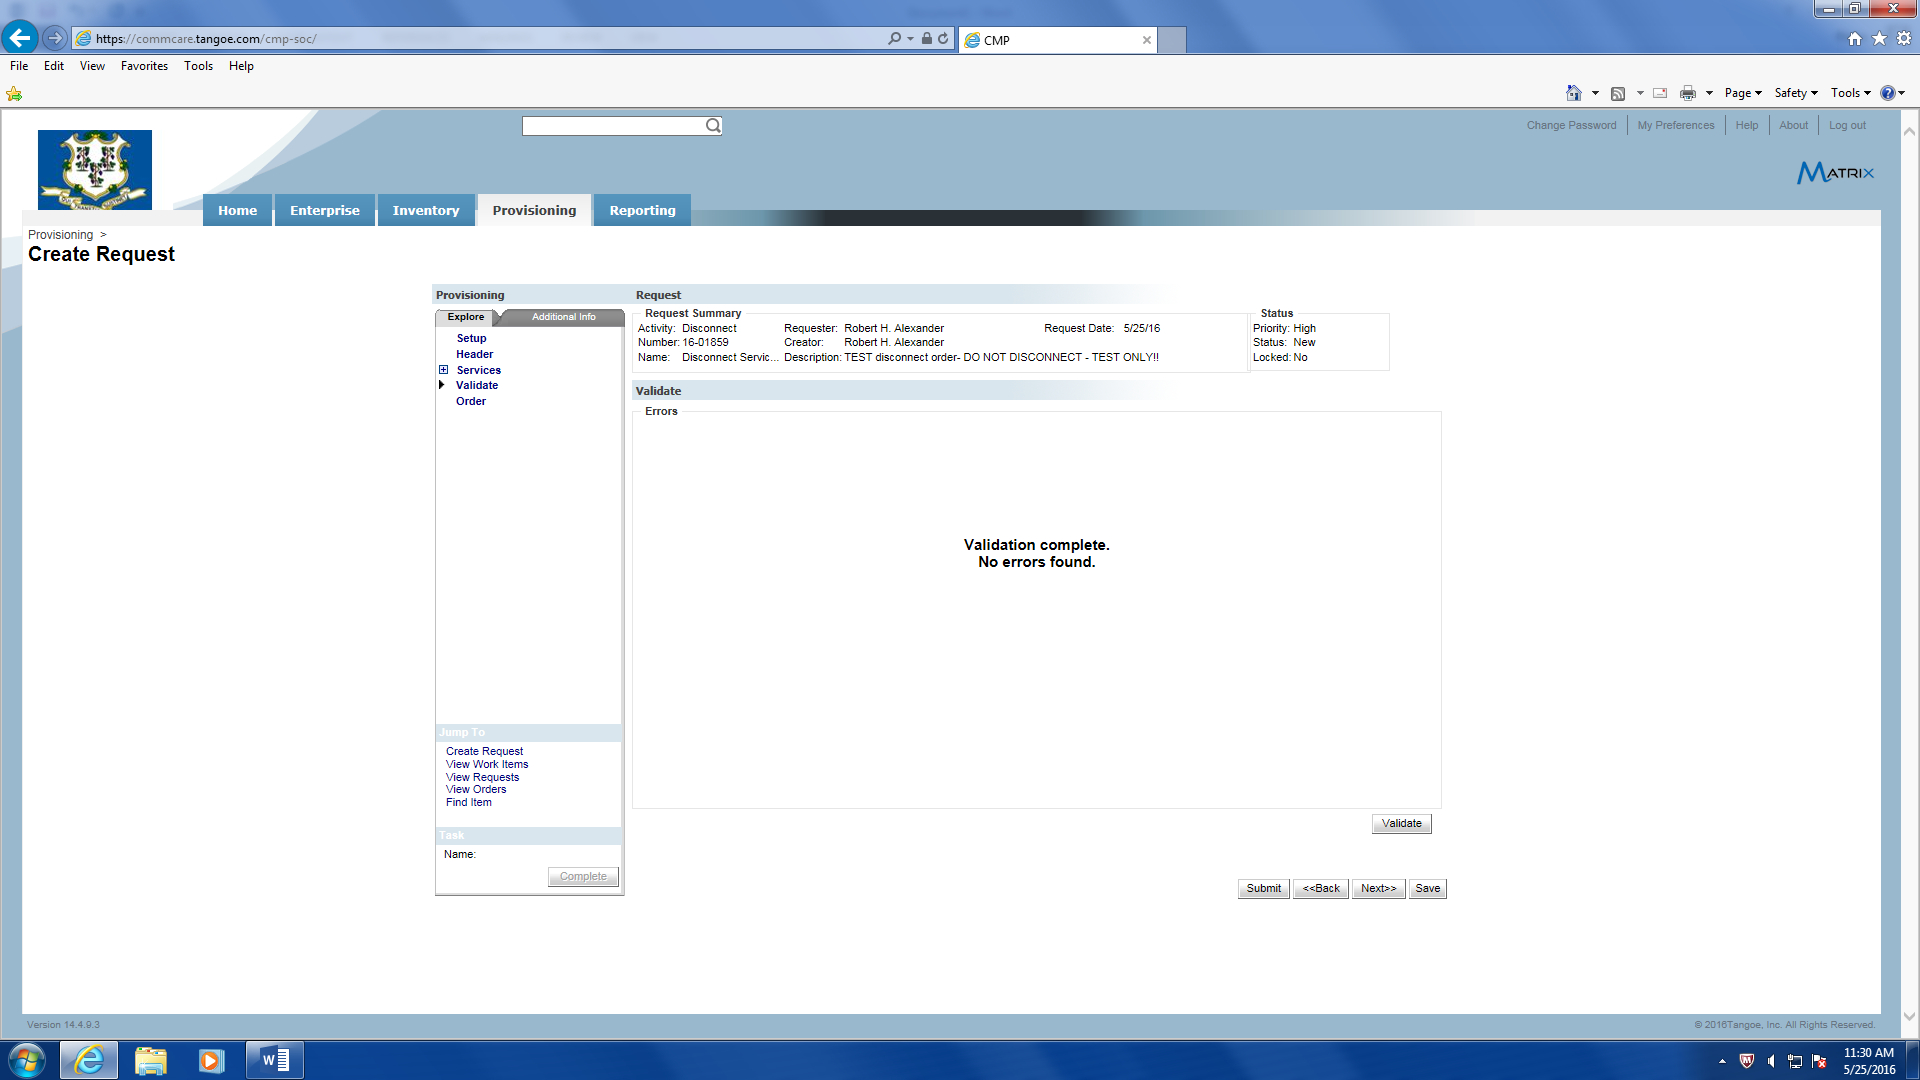
- On the ‘Validate’ screen click the ‘Validate’ button and if a failure occurs there will be a ‘Fix’ hyperlink next to the error message to link to the page where the error occurred. Click on the ‘Fix’ hyperlink, correct the error, and proceed to validate again. Once all errors are fixed click the ‘Submit’ button to process the disconnect order.
- Click on the ‘Add Item’ button (‘Add Account’ or ‘Add Location’ should not be selected) to select the inventory item to be disconnected via the ‘Select Inventory’ pop-up window.