
Editing a Marketing Page
The Marketing Page Template is used for marketing initiatives managed by one or more agencies that require more of a promotional layout. The Marketing page is similar to the Agency Landing Page, but does not provide a navigation box. However, other pages that link off the Marketing page will display a navigation box.
NOTE: The Marketing Page can also be edited from the Content Editor ![]() .
.
The step-by-step instructions will walk you through editing the Marketing Page from the Experience Editor.
- Log into Sitecore. Once logged in, you will be directed to your Agency website landing page in Preview Mode.
- Using the Navigation Bar, navigate to the Marketing page you wish to edit. Do not see the Navigation bar under the Experience Editor Ribbon?
- Select the > symbol after your Agency name to view a drop down of folders available. Keep drilling down until you come across the Marketing page you wish to edit, then select the edit button.
- Select the Go button. The Marketing Page will open with a yellow warning message, if it is unlocked.

- Select the Lock and Edit link in the message box.
- Edit any of the page areas:
- Select the Save Changes icon
 located at the top left of the screen.
 - Publish the Page by selecting the Publish
 icon in the Ribbon.
- If the Marketing Page has a workflow assigned to it, you will see a blue message bar with the option to Submit the page for approval.

- If the Marketing Page has a workflow assigned to it, you will see a blue message bar with the option to Submit the page for approval.
Marketing Banner
The Marketing Banner is the sites identity. It contains the title, logo, and a customized background image. To edit any of them, select one of the links below.
- Change the Logo
- Change the Title
- Change the Background image (can only be done from the Content Editor)
Change the Logo
- Select the logo image to activate the Image toolbar.
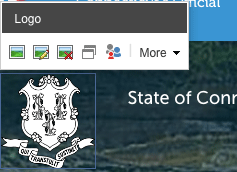
- Select the Choose an Image
 icon. The Media Library dialog box will appear.
 -
Select the Tree view
 icon to change the view to the content tree view.

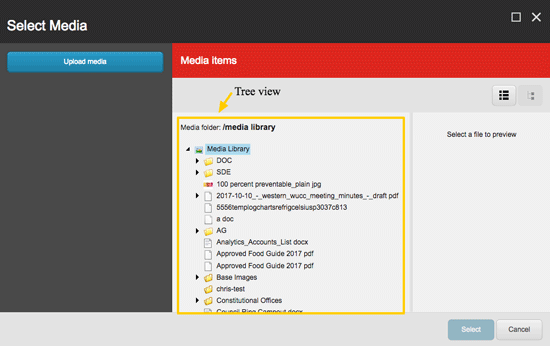
- Navigate to the Agency folder in the Media Library and select the image you wish to use from the ones displayed. If the image is not displayed, then upload your new image.
- Click the Select button to place the image header on the page.
- Select the Save Changes icon located at the top left of the screen.
Change the Text of the Marketing Name
- Select the Agency name text.

- Highlight the text you want to change.
- Change the text.
- Select OK.
- Select the Save Changes icon located at the top left of the screen.
Feature Boxes
The Feature Boxes are similar to the Most Popular Services links, except there is a visual image accompanying it. You have three boxes you can modify and promote services from. The boxes can link to topics or pages within your website, a document file (such as a pdf), or an external website.
Changing an Image and Hyperlink
- Select the image in the chosen feature box to activate the menu options.

- Select the Choose Image icon to change the image.
- This opens the Media Library window, which shows all uploaded images.
- Select the Tree view icon to change the view to the content tree view. (see step 3 on Change the logo)
- Select the new image you wish to use from the ones displayed. If the image is not displayed, then upload your new image.
- Select the blue Submit button to add the image.
- To change the hyperlink, select the Change Link icon
 .
.
- If linking to an internal page, browse to the file.
- If linking to an external site, enter the full URL (include http://) and set the Target Window to New.

- If linking to an internal page, browse to the file.
- Select OK.
- Select the Save Changes icon located at the top left of the screen.
Editing a Title
- Select the title in the chosen feature box to activate the menu options.

- To change the title, highlight the text you want to edit and change the text.
- To change the hyperlink, select the Change Link icon . (see step 6 on Changing a Hyperlink)
- If linking to an internal page, browse to the file.
- If linking to an external site, enter the new URL.
- Select OK.
- Select the Save Changes icon located at the top left of the screen.
Editing the description text
- Select the description text in the chosen feature box to activate the menu options.

- To change the description text, highlight the text you want to edit and change the text.
- Select the Save Changes icon located at the top left of the screen.
Quick Link Lists
The Quick Link Lists displays three columns of three different lists. The list items can link to topics or pages within your website, a document file (such as a pdf), or an external website. The title for each list can be modified as well.
Changing a List Title
- Select the Quick Link Title in the grey bar to activate the menu options.
- Highlight the title text to rename it.

- Select the Save Changes icon in the upper left corner of the browser.
Adding a New Link
- Select the Quick Link list title. Once selected, a list of icons will appear titled List-of-Links.
- Select the Add Item icon
 . The Insert Item dialogue box will appear.
 - Select LinkItem. It will have a light blue background when selected.
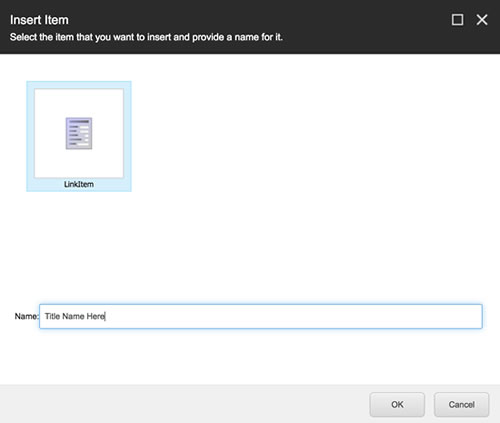
- In the Name field, enter the title of the link you are adding. This name will appear in the Quick Link List. It can be changed later if needed.
- Select OK, The window will close and the page will refresh. Once the page refreshes, the new link item will be added. The next step is to edit the link.
- Select the Save Changes icon in the upper left corner of the browser.
Editing a Link
- Select the link title to activate the menu options.

- Select the Change Link icon
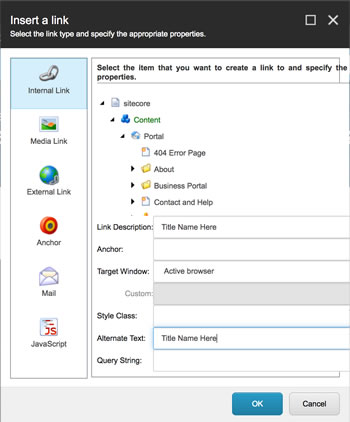
 . The Insert Link Dialog box will show.
 - To link to an internal page, select the Internal Link icon from the left pane, then browse the Content Tree to select an internal page.
- Change the Link Description if needed.

- Select OK.
- To link to an external site, select the External Link icon to add an external link. Add the Link Description, URL and change the Target Window to "New".
- Select OK.
- Select the Save Changes icon in the upper left corner of the browser.