
Most Popular List
Managing the Most Popular List through the Content Editor.
- Creating a Link
- Insert link - Link to a page, folder, list, or navigation item within your or another Sitecore website
- Insert media link - Link to a document or image within your Media Library
- Insert external link - Link to an external website page
- Editing a Link
- Deleting a Link
Creating a Link
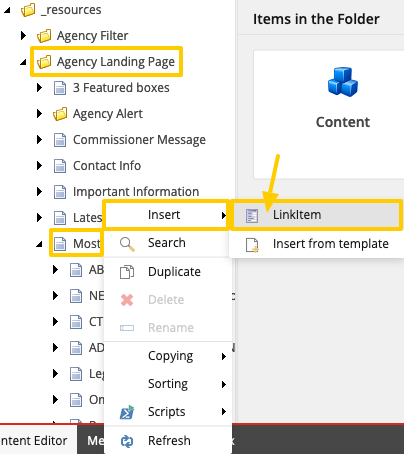
- From the Content Tree, navigate to the Most Popular item from Content > Portal > [Agency Acronym] > _resources > Agency Landing Page > Most Popular
- Select the arrow next to Most Popular to expand the view.
- Select the Most Popular title.
- Right-click and select Insert > LinkItem. A dialog box will appear.
- Enter in the title of your new Most Popular item in the field.

- Select the OK button. The Link properties will show up in the Content Area and the item is Locked (Checked out).
- Scroll to the Link Section.
- Select the Clear link to delete the default path (http://#).

- Select one of the following link types from the Link field:
- Insert link - Link to a page, folder, list, or navigation item within your or another Sitecore website
- Insert media link - Link to a document or image within your Media Library
- Insert external link - Link to an external website page
- Insert anchor - Link to a specific anchored section of another page
- Insert email - Link to an email address
- Insert JavaScript - Link to a JavaScript file (Not Allowed)
- Follow - Unknown (Currently does nothing)
- Clear - Clears the contents in the field
- Save
 your changes.
 - Check in
 the page to Unlock it from the Home tab, then Edit drop down.

To Preview the change before publishing it, select your Agency title in the Content Tree from the Content Editor ribbon, select the Publish tab, then the Preview ![]() icon.
icon.
Inserting an Internal Link
- To insert an internal link, select the Insert Link.

- Navigate to the page you wish to link to and select it.
- Enter in the Description and Alternate text in the popup dialog box.
- The description field is the Link Title that is displayed on the page. If this is not entered, the Title defaults to the page title you are linking to.
- The Alternate text field is displayed when you hover over the link title, to help provide more information to the visitor.
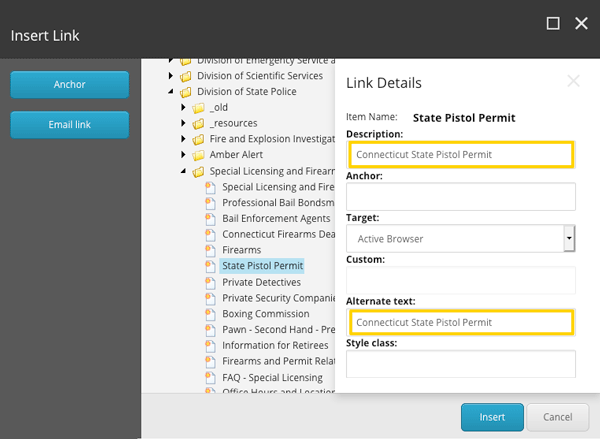
- Select the Insert button.
To make changes to the link, re-select the Insert link and the dialog box will appear with the information. You can alter the page link, the link description, or the alternate text.
Inserting a Media Link
- To insert a media link, select the Media Link.

- Navigate to the document file you wish to link to and select it.
- Enter in the Description and Alternate text in the popup dialog box.
- The description field is the Link Title that is displayed on the page. If this is not entered, the Title defaults to the page title you are linking to.
- The Alternate text field is displayed when you hover over the link title, to help provide more information to the visitor.

- Select the Insert button.
To make changes to the link, re-select the Insert link and the dialog box will appear with the information. You can alter the file, the link description, and the alternate text.
Inserting an External Link
- To insert an external link, select the Insert external link.

- Enter information in the following fields:
- Link Description: Enter the Link Title. This is what is displayed on the page. If it's not entered, the Title will be blank.
- URL: Enter the full website address (URL).
- Target Window: Select New Browser from the drop down. This will open a new browser tab when the link is selected.
- Alternate Text: The text is displayed when you hover over the link title, to help provide more information to the visitor.

- Select the Insert button.
To make changes to the link, re-select the External link and the dialog box will appear with the information. You can alter the URL, the link description, the target window, and the alternate text.
Editing a Link
- Select the arrow on
 Most Popular to expand the page and display the links listed.

- Select one of the links to edit the title and hyperlink.
- From the Content Area, select the Lock and Edit link from the yellow message bar.

- Scroll to the Link Item Data Section.
- Select the Clear link to remove the existing path.

- Select one of the following link types from the Link field and follow the prompts:
- Insert link - Link to a page, folder, list, or navigation item within your or another Sitecore website
- Insert media link - Link to a document or image within your Media Library
- Insert external link - Link to an external website page
- Insert anchor - Link to a specific anchored section of another page
- Insert email - Link to an email address
- Insert JavaScript - Link to a JavaScript file (Not Allowed)
- Follow - Unknown (Currently does nothing)
- Clear - Clears the contents in the field
- Save your changes.
- Check in the page to Unlock it from the Home tab, then Edit drop down.
To Preview the change before publishing it, select your Agency title in the Content Tree from the Content Editor ribbon, select the Publish tab, then the Preview ![]() icon.
icon.
Deleting a Link
- Select the Link title.
- Right-click the link title to view drop down.
- Select the
 Delete option.
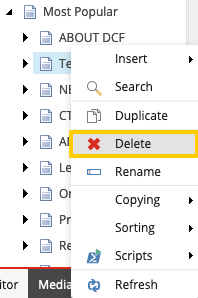
- Select the Most Popular file to Publish the deletion.