Making a Clear-Bottom Bucket
You can use the instructions below to make a clear-bottom bucket for viewing freshwater mussels.
MATERIALS
- 5-gallon plastic pail
- Power drill and 12 inch drill bit
- Jigsaw and blade
- Glass cutter
- Sheet of plexiglass (at least as wide as the diameter of the bucket)
- 1 tube of waterproof silicon sealant and dispenser
- Heavy weight
- Sharpie or other permanent marker
Step 1
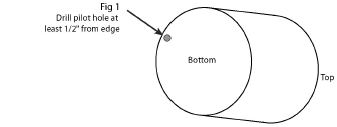
(Fig 1): Flip the bucket upside down and drill a pilot hole through the bottom of the bucket, near the edge.
Step 2
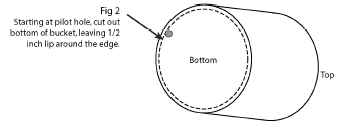
(Fig 2): Using the jigsaw, cut out the bottom of the bucket, starting at the pilot hole. Leave a 12 inch lip around the edge.
Clean the rim after the bottom is cut out.
Step 3
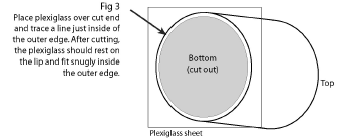
(Fig 3): Place plexiglass sheet over the bucket and trace a circle to fit snugly in the space.
Step 4
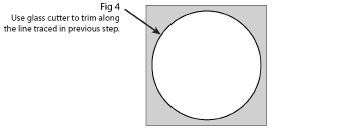
(Fig 4): Using a glass cutter, carefully cut the plexiglass along the line drawn in Step 4. Once cut, clean the edge and place over the bottom of the bucket, and trim to fit.
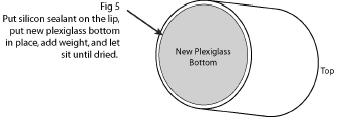
Step 5
(Fig 5): Without the plexiglass in place, lay a thick uniform bead of silicon sealant on the 1/2" lip around the bottom of the bucket.
Insert plexiglass disc into place, put heavy weight on top, and let set for at least 24 hours.
Step 6
If your bucket is white, we recommended that you paint the outside black (use several coats of spray paint) to reduce the amount of light that passes through, which will cut down on glare and make it easier to see into the water.
Step 7
If the bucket leaks, reapply silicon sealant to plug the leaks.

